.jpg)
| Home |
Clothes Dryer Maintenance
How to clean the lint out of your dryer
Did you know that every year over 15,000 house fires in the
United States are caused by improperly vented clothes dryers?
When we bought our house, the former owner complained that the clothes dryer
wasn't working very well and might need to be replaced. It turned out that the
dryer did have problems of its own, but the biggest problem was a clogged dryer
vent. It looked like they hadn't cleaned it out in the seventeen years they
lived in the house! I am not exaggerating when I say that the effective diameter
of the vent was the thickness (or thinness) of a garden hose! No wonder the poor
dryer wasn't working well -- this was the mechanical equivalent of a heart
attack caused by clogged arteries!
To make matters worse, rather than use the recommended four inch round rigid aluminum ductwork to vent the dryer, they had used one of those flexible plastic hoses, and compounded the problem by not even trimming it to the proper length. They just left the extra hose coiled up behind the dryer!
So needless to say, one of the first projects I did in the house was to replace the dryer vent.
Installing the dryer vent
Click on
any of the images for a larger view.
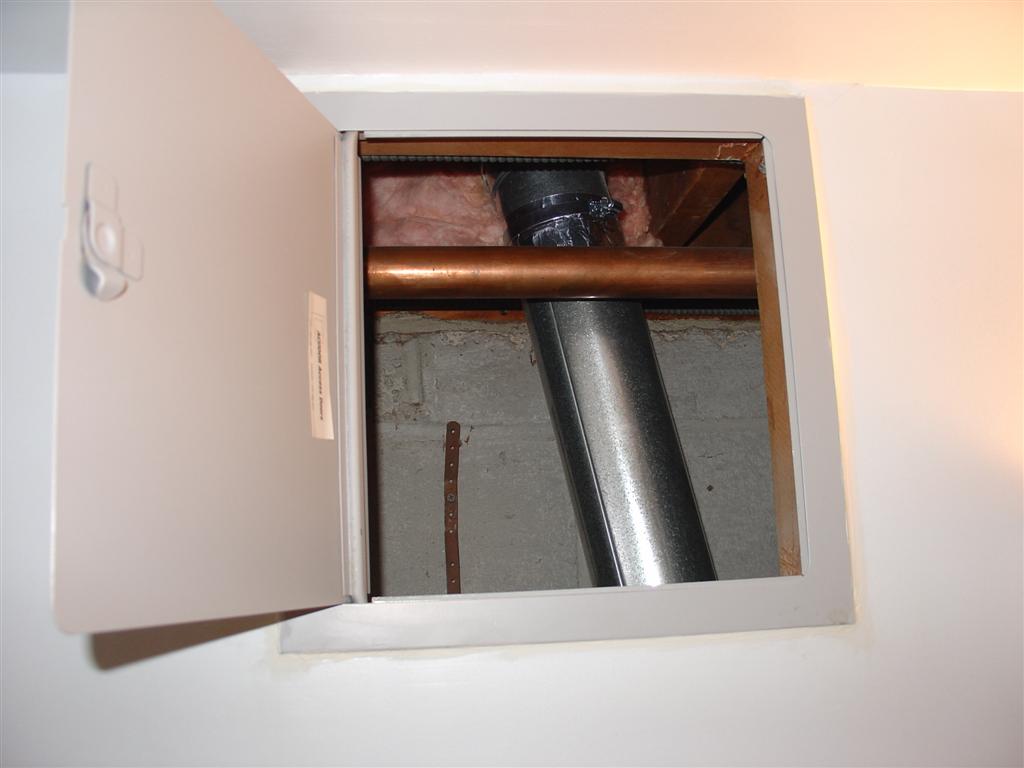
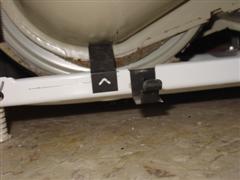
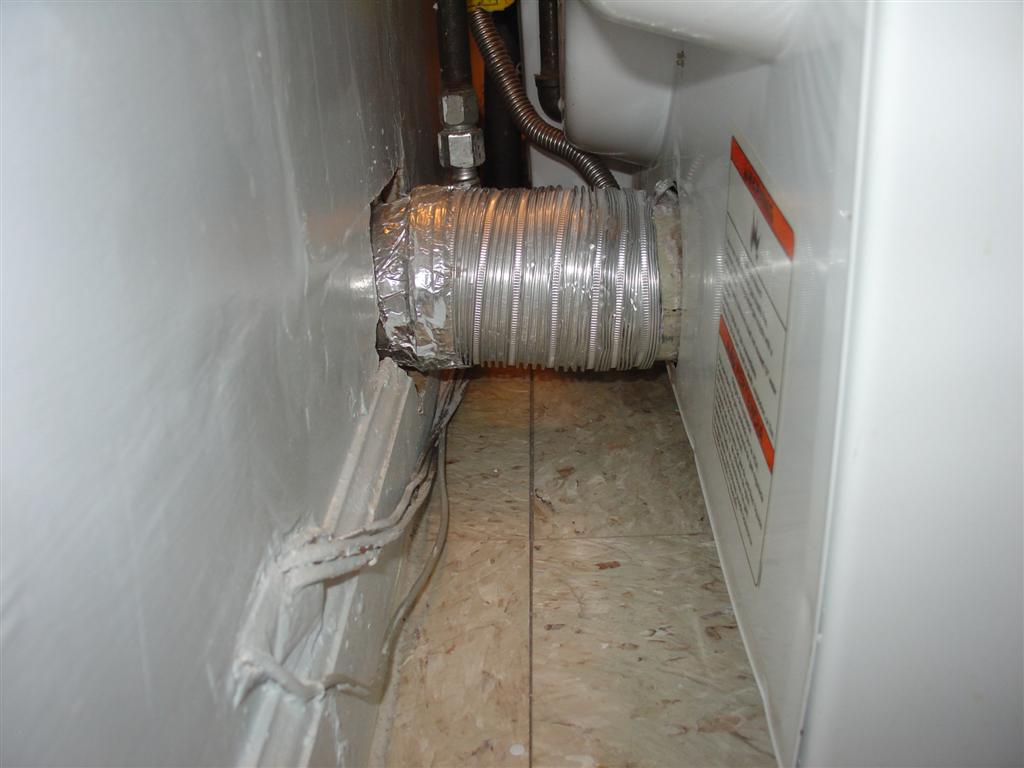
| The original owner of our house finished the basement, including the laundry room. The good news is the dryer backs up to the front wall of the house so it is a short run up and out. The bad news is I had to break holes in the wall to install the ductwork. I decided to put access doors in so that I can get back behind the wall in the future without making more holes in the sheetrock. This is the upper door, about six feet above the floor, with the 4" round rigid aluminum dryer vent ductwork visible behind a copper water pipe. |
 |
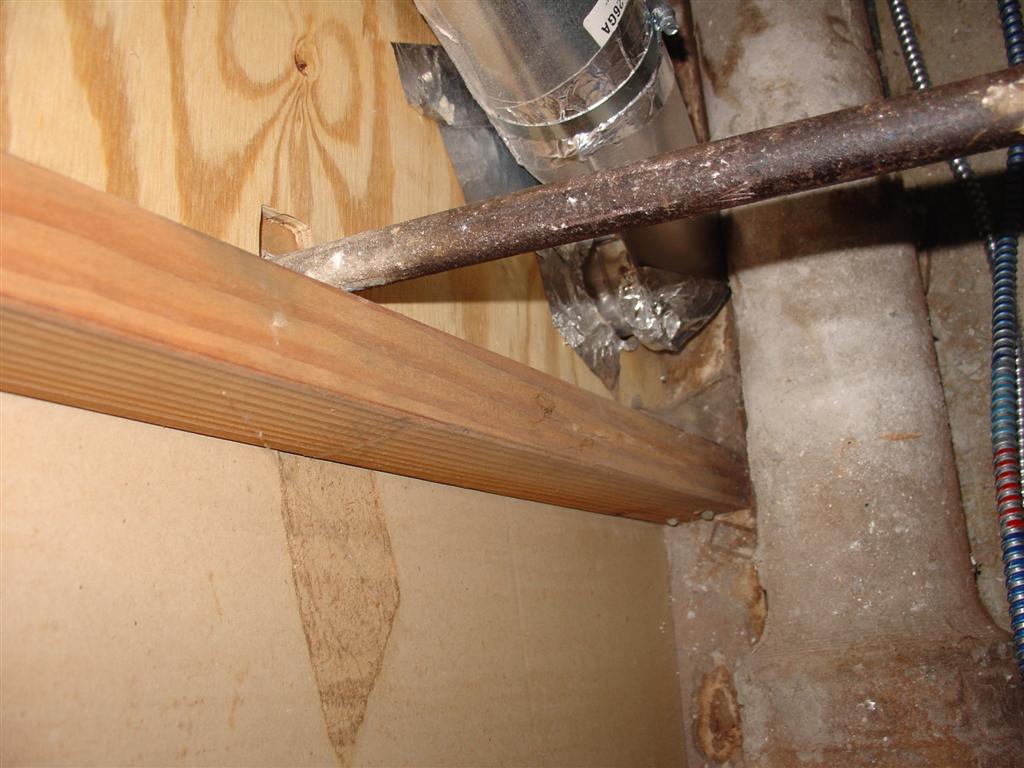
| This is the lower door, about two feet off the floor. Unfortunately I had to use a short piece of aluminum flex hose to connect to the dryer, and behind it a rather tight elbow, because there is a large diameter cast iron sewer pipe at floor lever immediately behind the wall, exactly where I would ideally like my dryer vent to go. The sewer line trumps my dryer vent, so I had to do the best I could with a less than ideal situation for venting my dryer. |
.JPG) |
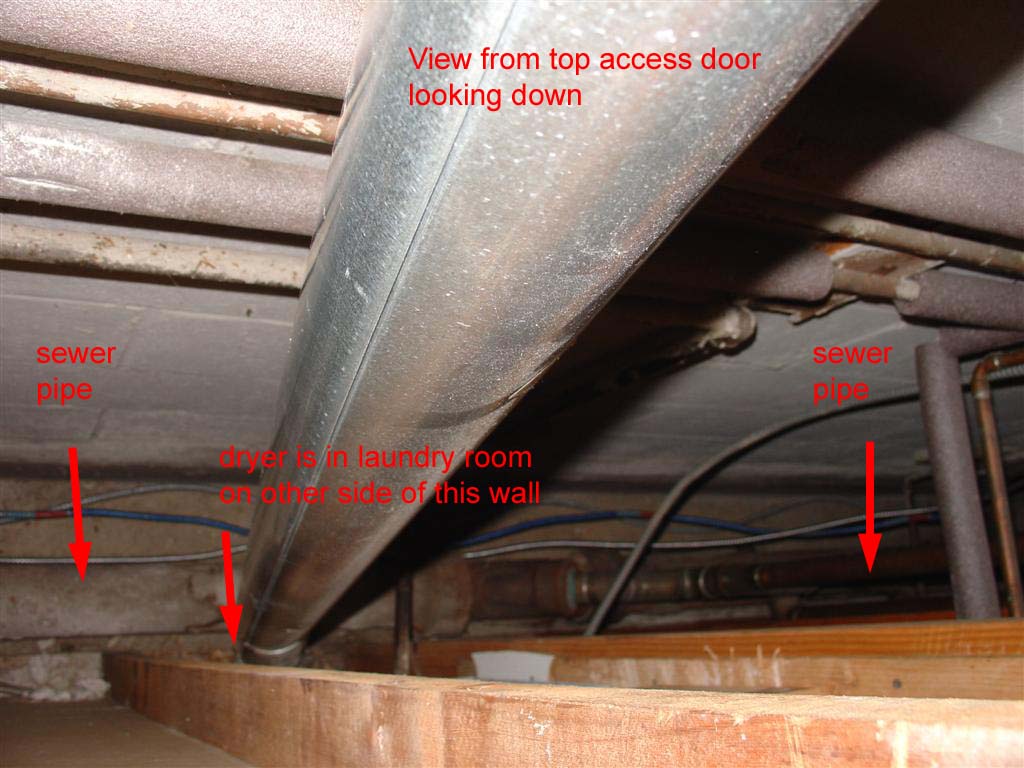
| Here are two views of the ductwork behind
the wall. The perspective is a little disorienting, because I stuck the
camera through the access doors to take the pictures. The first picture is looking down. The foundation is at the top of the picture and the finished wall, with dryer behind it, is at bottom. |
 |
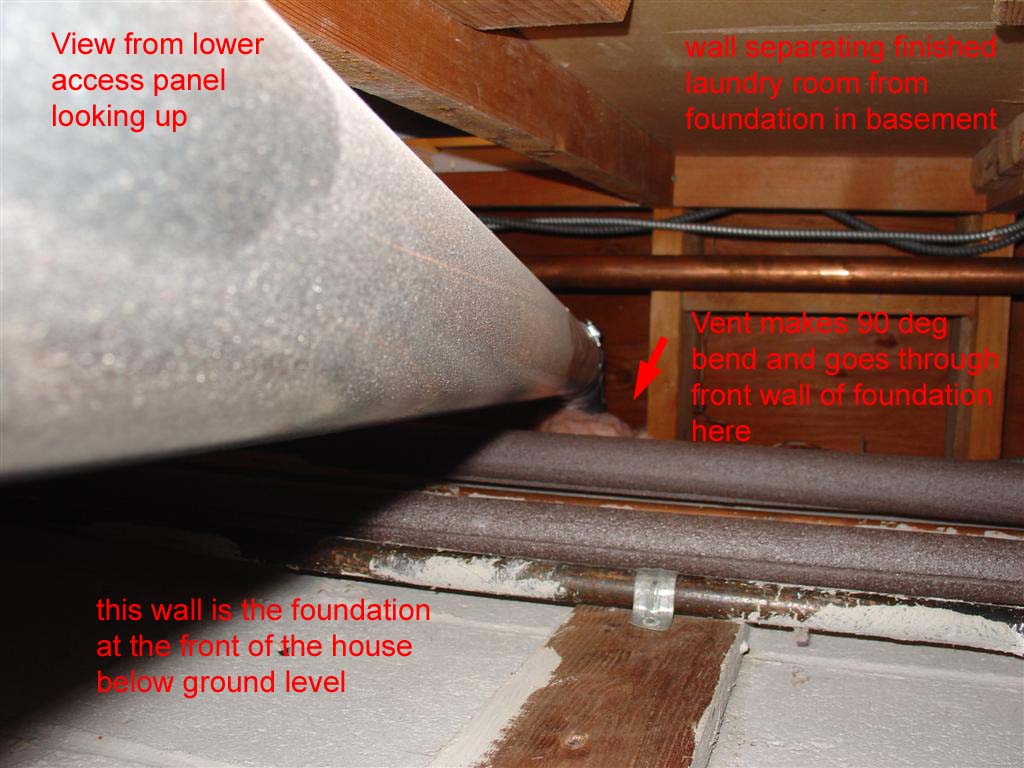
| This is the view looking up. The bottom
of the picture is the foundation wall at the front of the house, and the top
of the picture is the finished wall separating the laundry room from the
foundation. The duct makes a 90 degree bend at the center of the picture
towards the outside, which is towards the bottom of the picture, where it is
connected to the external dryer vent. It is important that nothing stick through the dryer vent. Do not screw the ductwork together. Screws sticking into the lint stream will trap lint, and make it hard for you to clean your dryer vent. Use external straps and clamps instead. |
 |
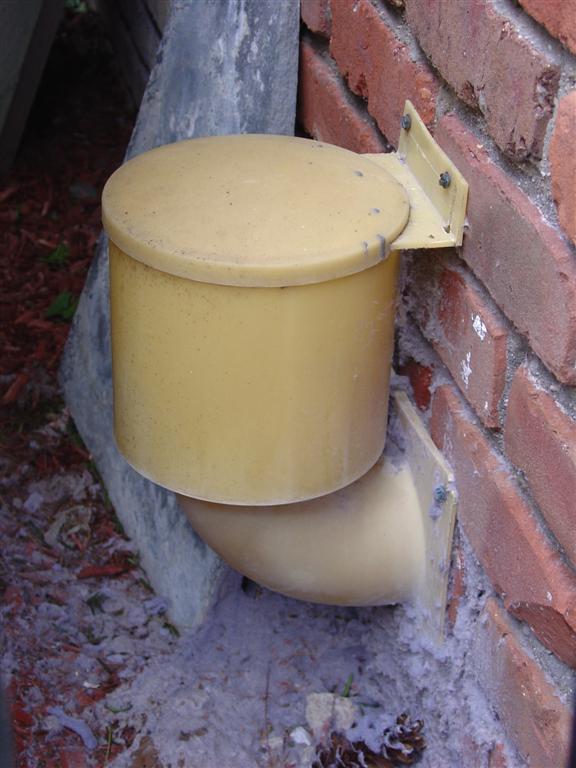
| I found this great outside dryer vent in a local home improvement store. I haven't seen one like it before or since. It is far superior to those feeble flapper vents. It has a simple but elegant design; it closes securely, lets lint and exhaust gas out, but doesn't let cold air, insects, or critters in. Some people might find it a little obtrusive, but it is hidden behind a bush and not visible unless you are looking for it. |
 |
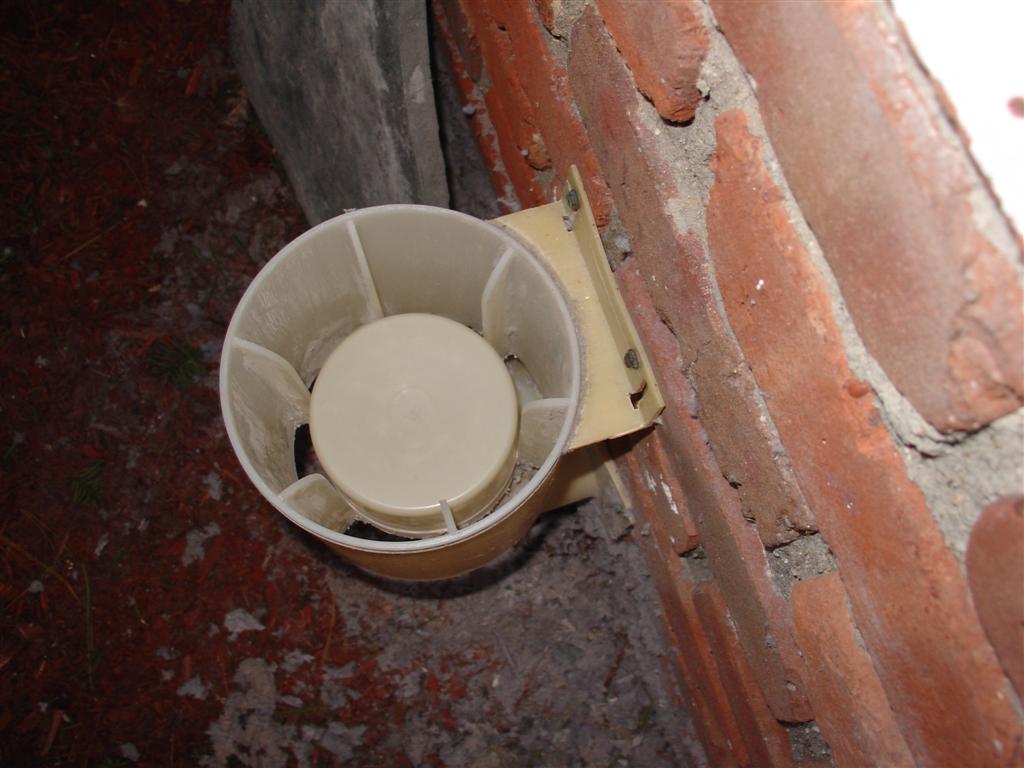 |
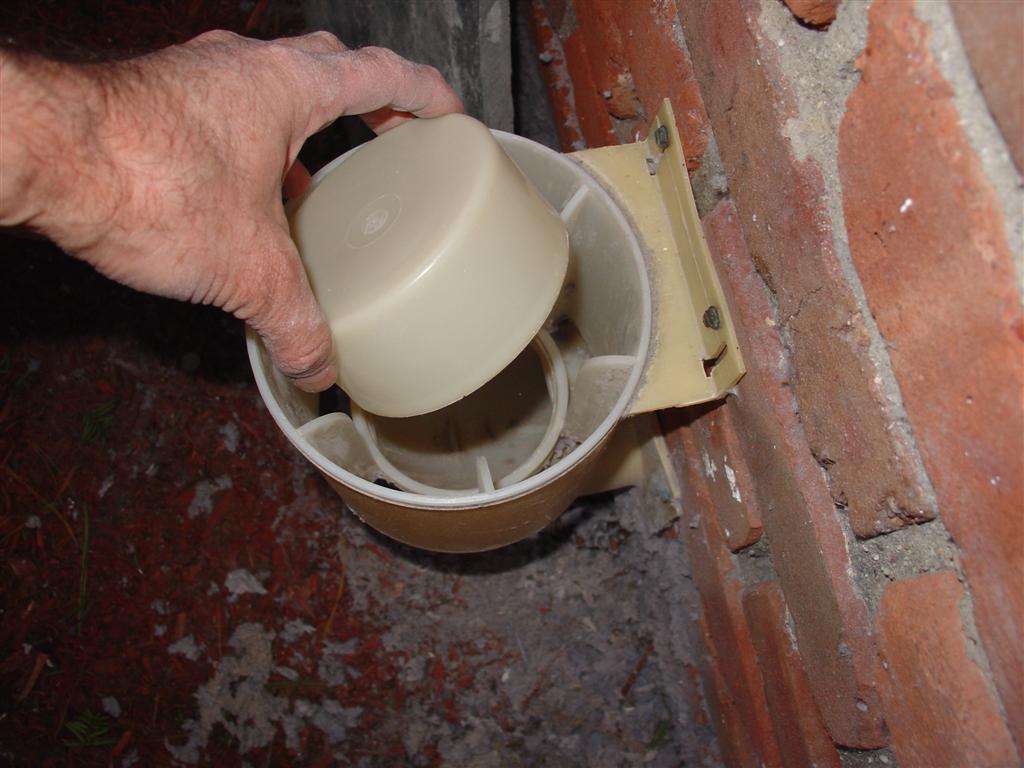 |
| With the outer cap removed, you can see an inner cup which drops down when the dryer is not on, but it is light enough to float up on the air stream when the dryer is on. | Here is a better view of the inner cup. This vent is large and easy to clean. The outer cap protects the vent from rain, snow, and ice. |
Let's recap some basic dryer vent installation
recommendations, and then I will
get into cleaning the dryer vent in detail.
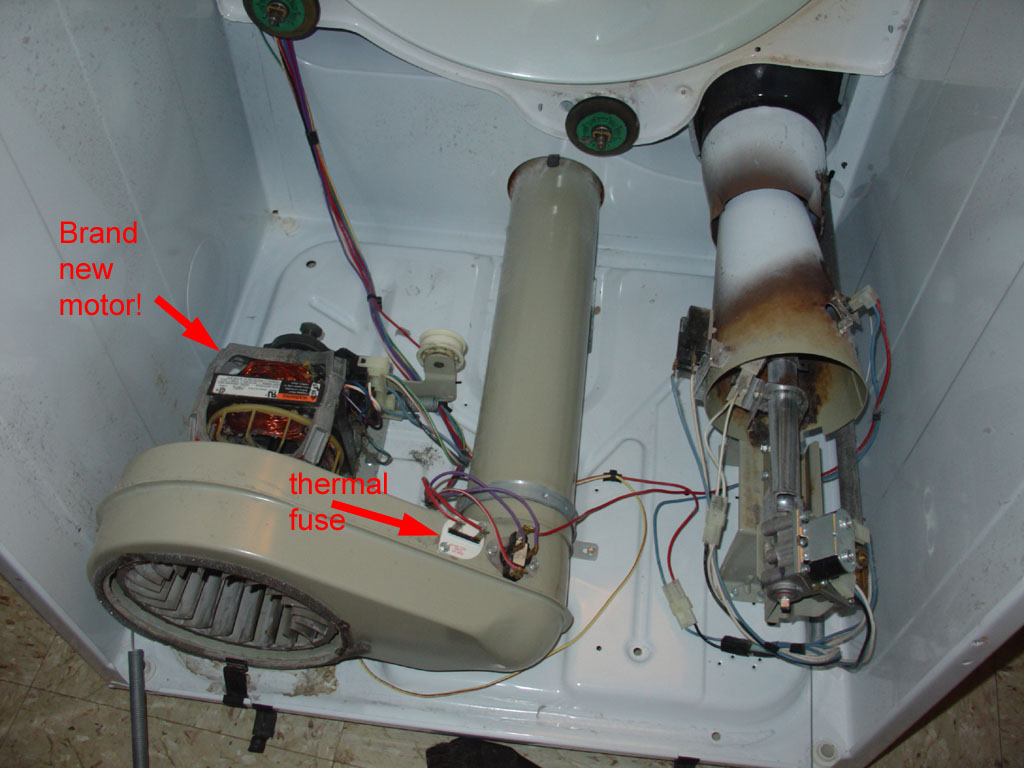
Besides routine lint cleanouts, I have taken this dryer apart
several times in the past. I replaced the thermal fuse twice, and also
replaced the motor when it was just out of warranty. This would have been
prohibitively expensive if I had to call a technician and would likely have
cost almost as much as a new dryer. Instead I bought a new motor and replaced it myself (and the belt as well, as long as I had it all apart) and
countless loads of laundry later it is still working fine.
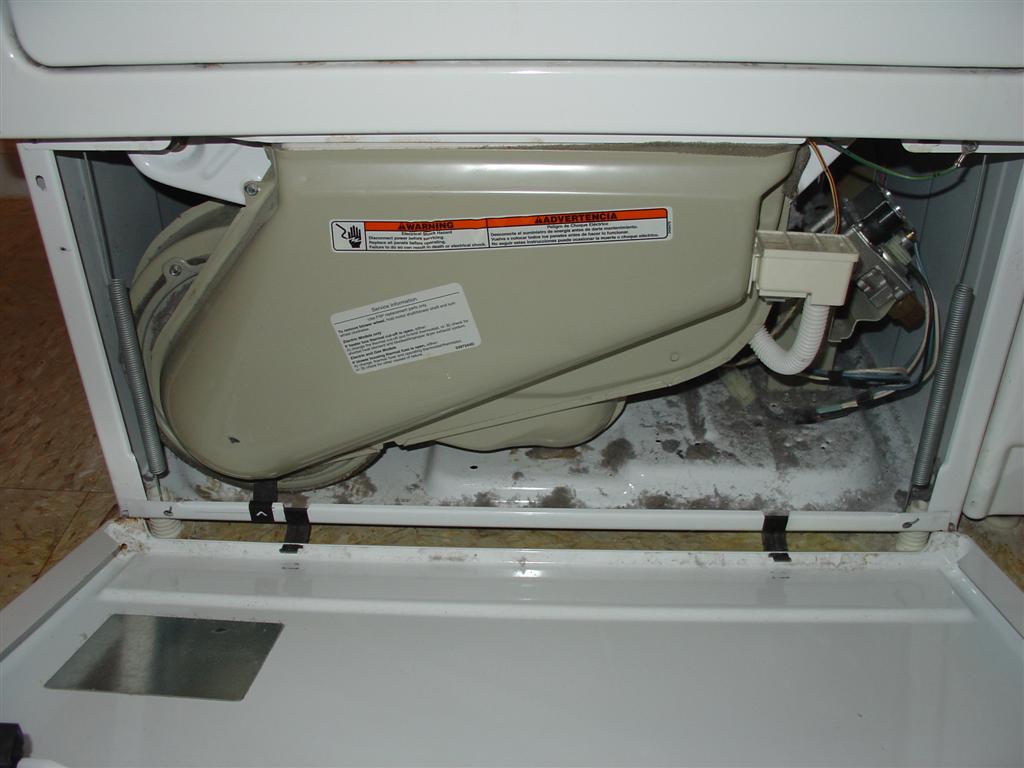
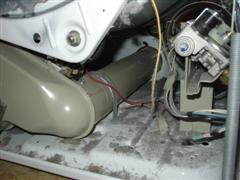
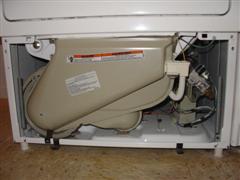
You can clearly see the burner assembly on the right, and the motor, fan,
and ductwork on the left. If you click the picture, I have highlighted the thermal fuse. In many
cases, if your dryer will not ignite, a burned out thermal fuse is your
problem. The good news is the thermal fuse is very easy to troubleshoot and
to replace by yourself. Look at all that lint!
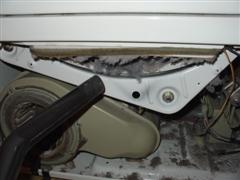
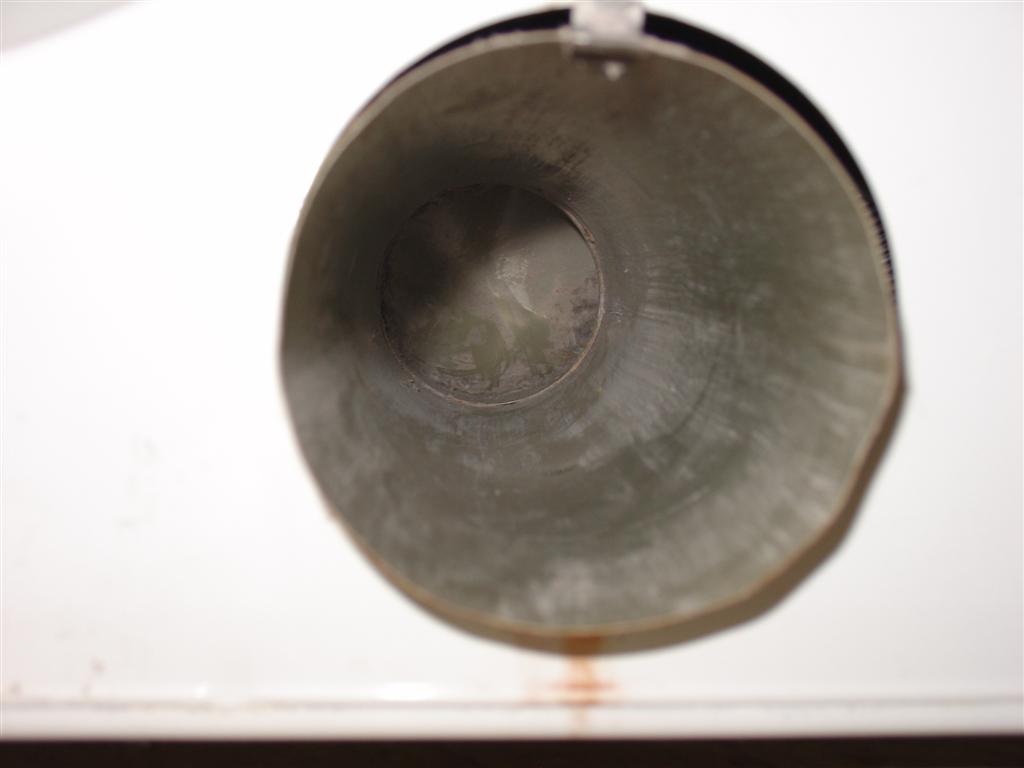
This is the back of the dryer showing the exhaust vent before
I cleaned out the lint.
Cleaning the dryer vent
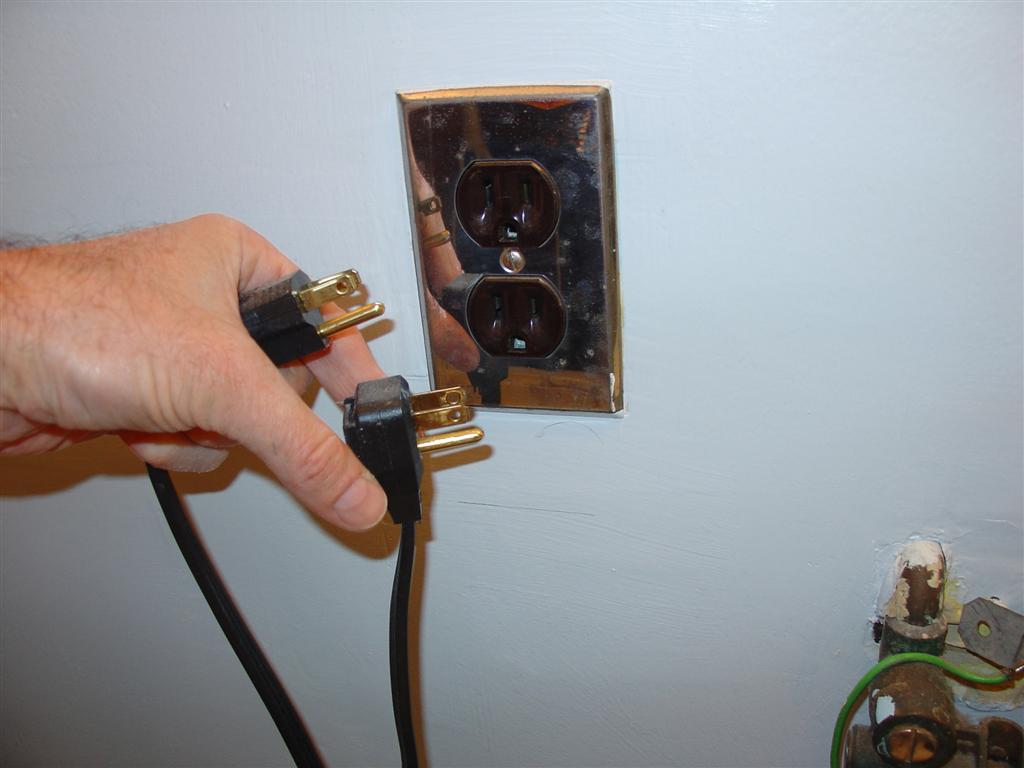
The first step is to unplug the dryer, especially if it is an electric dryer,
but even if it�s a gas dryer do yourself a favor and unplug it for safety�s
sake. Otherwise you might be surprised, like I was, when, while reaching around
inside with a vacuum cleaner hose, you accidentally touch a "hot" electrical
connection and get a little jolt. I wasn't hurt, but it was a wakeup call and a
friendly reminder for safety first and to always unplug any electrical appliance
before working on it, no matter how simple the repair is and no matter how experienced you
are.
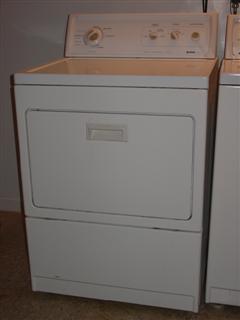
This is my Sears Kenmore Series 90 dryer. We bought it new
along with a matching Kenmore washing machine,
partially visible to the right of the dryer, from Sears in 1998. The model
number of the dryer is 110.76902692 and the stock number is 76902. It uses
natural gas and is rated at 22,000 BTU.
This is a picture I took of the inside of the dryer while I
was replacing the motor. The
cabinet has been taken off, and the drum and belt have been removed. Unfortunately I
did not think to take pictures of the entire disassembly process. Next time.
As usual with appliance maintenance and repair, half the battle is figuring
out how to open the appliance to access its components without damaging it.
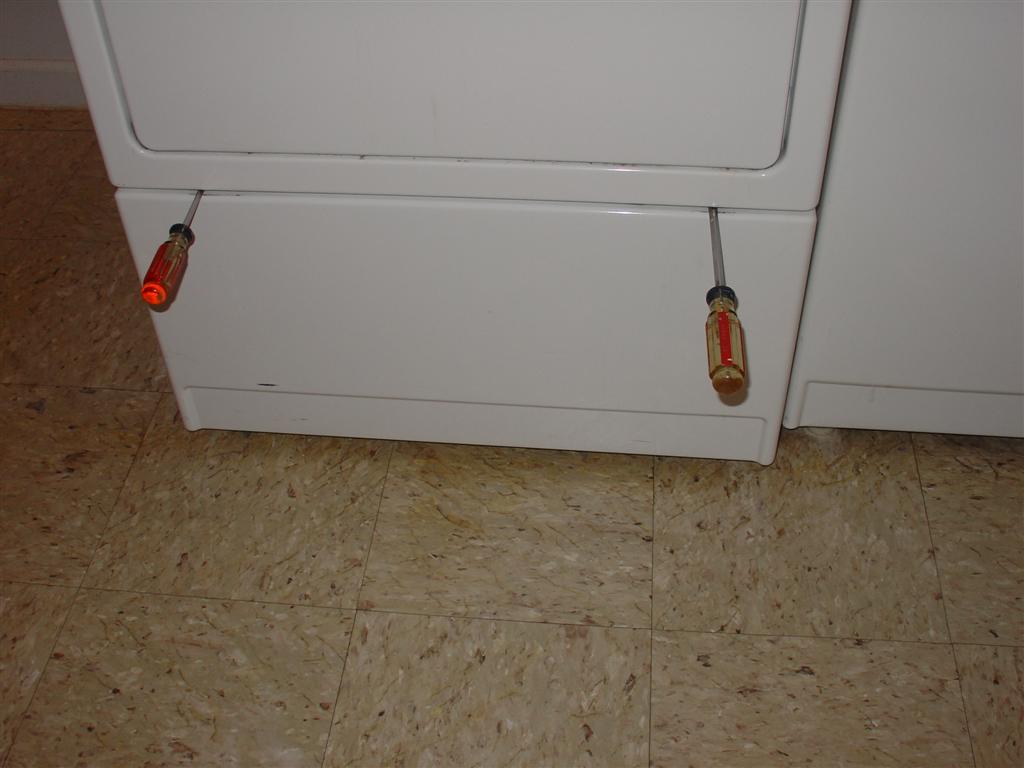
Back to the task at hand: there are two spring clips which hold the lower half
of the front panel of the dryer on. This lower panel must be removed to clean
lint out of the inside of the dryer. If you bend down and look closely you can
see the spring clips. You can do this with one screwdriver, but it is MUCH
easier with two. Actually any thin piece of metal should work, such as a bread
knife or putty knife, but I used screwdrivers. Slide the screwdriver into the
slot and push the spring clip down so it disengages with the upper panel. This
is the tricky part. In order to remove the lower panel you have to disengage
both clips at the same time, and then pull the lower panel down towards you.
Three hands would be best, but it can be done easily enough with two.
Here is a close up of one of the spring clips. The upper
part of the clip inserts into a slot in the upper part of the cabinet, so
the trick is to get the screwdriver in between the clip and the upper part
of the cabinet, and then push down on the clip while pulling the top of the
lower panel out towards you.
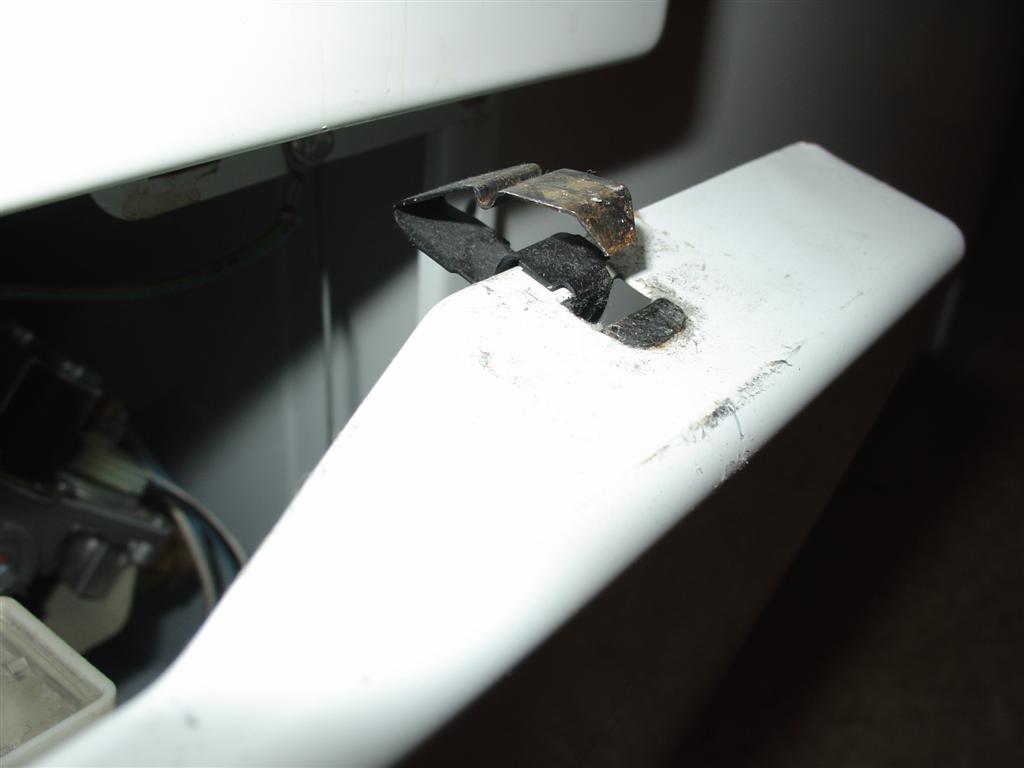
The left spring clip has been disengaged and the left side
pulled forward slightly.
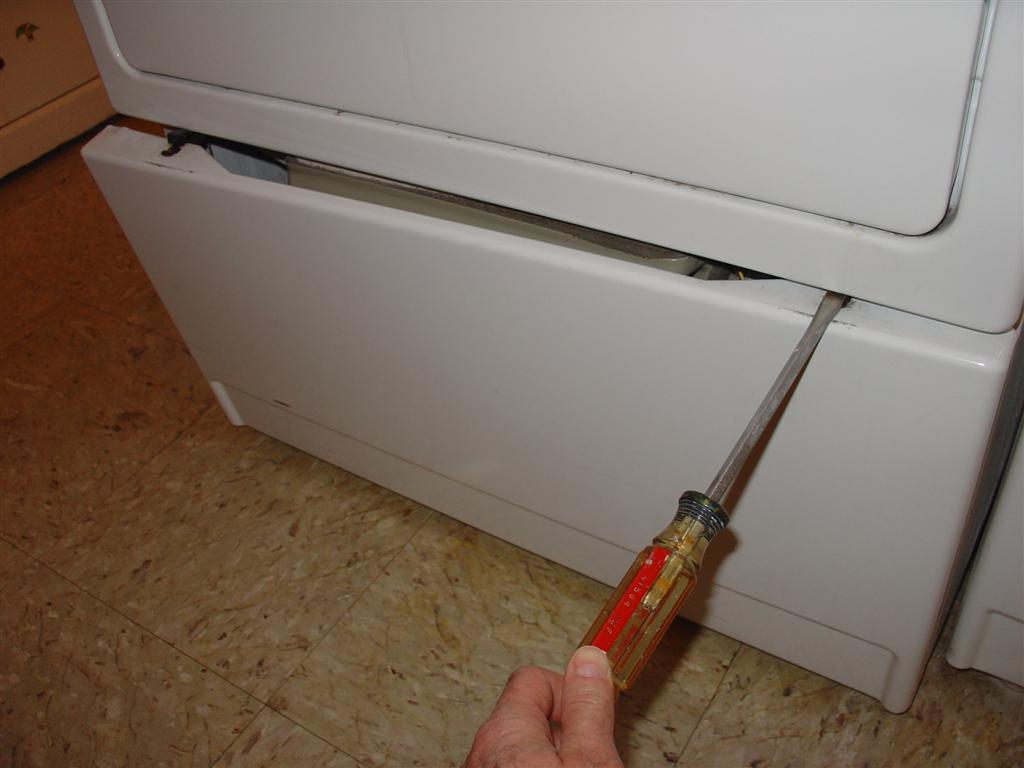
Here you can see the lower panel is opened. It is connected on the bottom by two
thin strips of metal which fit into slots on the lower panel. Lift the panel off
and put it aside where you won't step on it.
This is a closer view of one of the two metal tabs. You can
see how it fits into a slot on the bottom of the panel.
.JPG)
Next the fan cover ducting needs to be removed. It is secured by several screws.
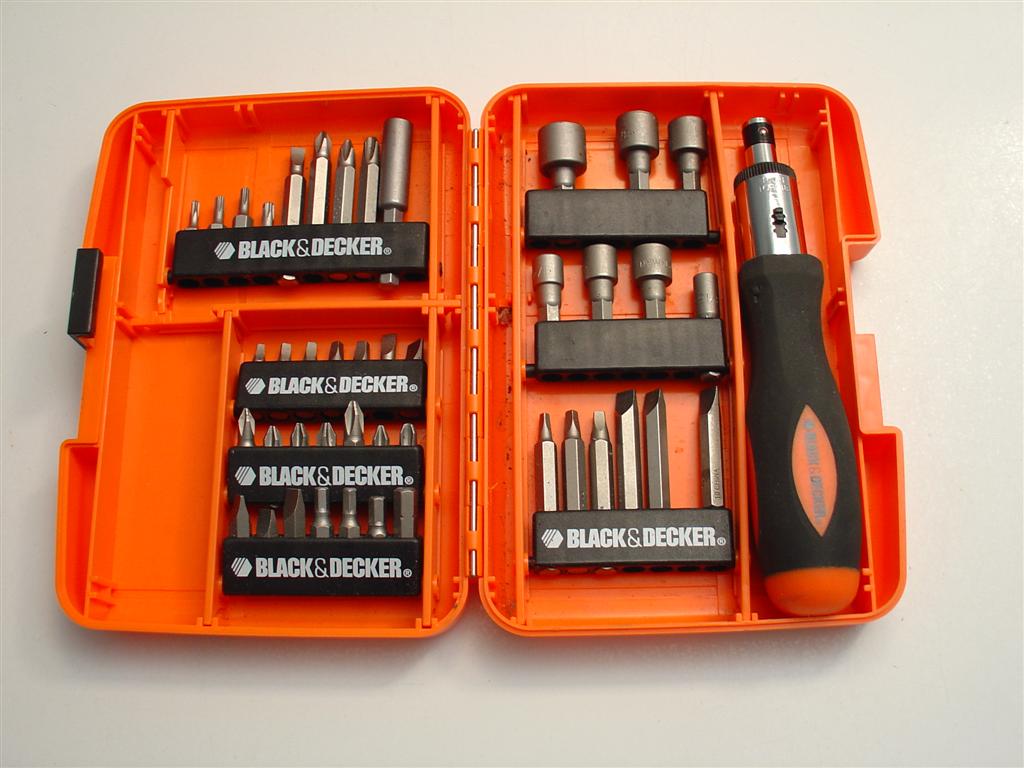
Do yourself a favor and buy a 1/4" nut driver if you don't already own one. A
socket wrench with extension will work too. This multi tool kit that my kids
bought me for Christmas is great for those unusual tools that you might not use
on a daily basis.
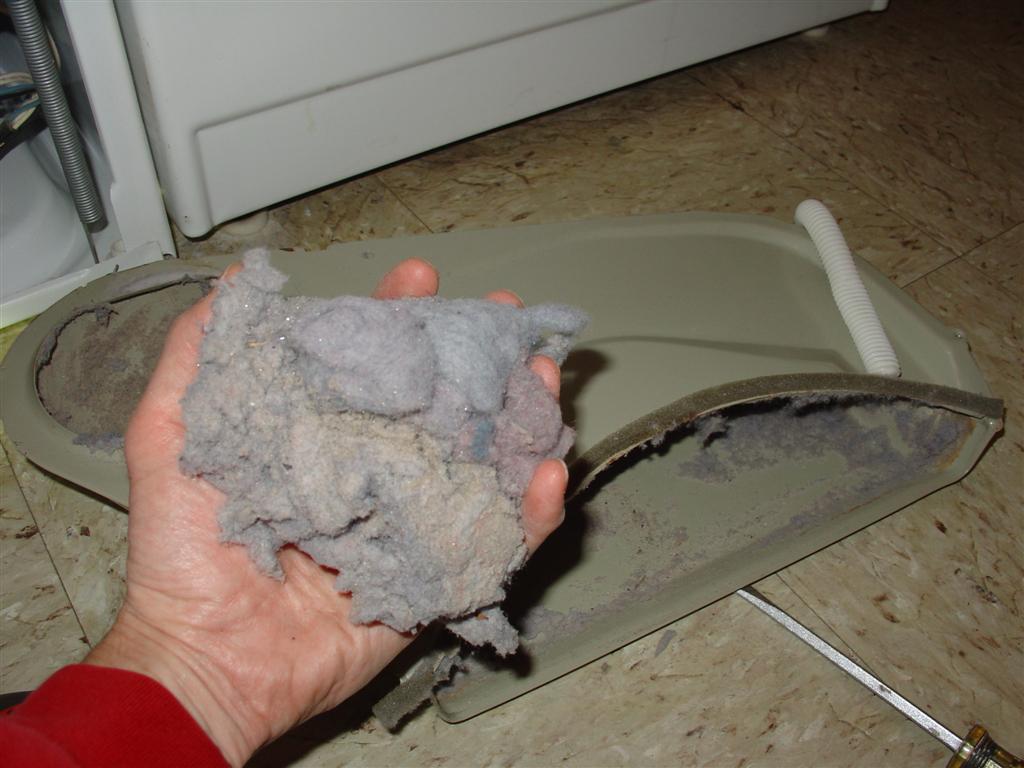
First you have to remove the lint screen. You should clean
the lint screen before (or after) every load. You would not believe how much
lint can come off of some fabrics, especially when they are new.
Click here to see what I scraped off the lint
screen from one load of new towels. It's enough to choke a horse!

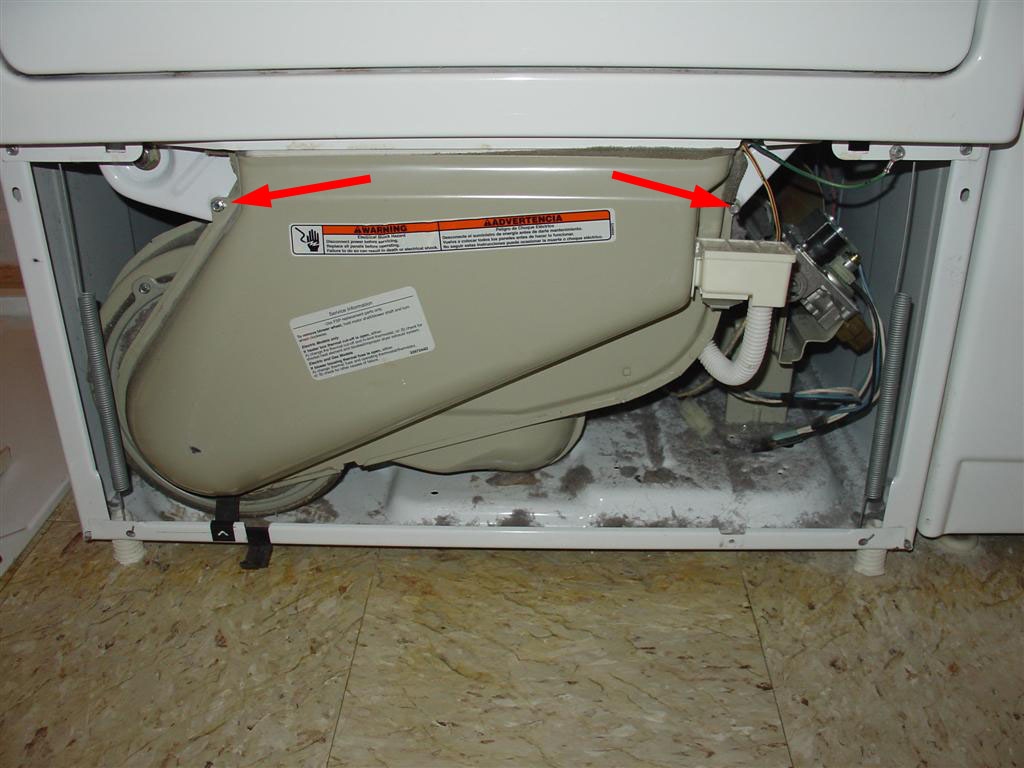
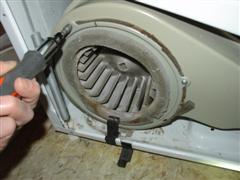
The fan cover is secured by two screws. Click the picture to
see the location of these screws. Remove the screws and put them someplace where you will not vacuum them up
later. Don't laugh, I've done this, but I am more careful now.
Remove the fan cover. Look at all that lint! Vacuum it out, and then put the fan
cover aside. That is as much disassembly as you need to do. Carefully vacuum out
the lint from everywhere you are able to reach inside the dryer. Don't forget
electrical connections, around the motor, and in the back corners.

You will be surprised how much lint is inside your dryer.
This is what I scraped out of the fan cover. I usually find a few coins as
well.


Pull the dryer away from the wall. Vacuum out the exhaust vent as far as you can
reach.
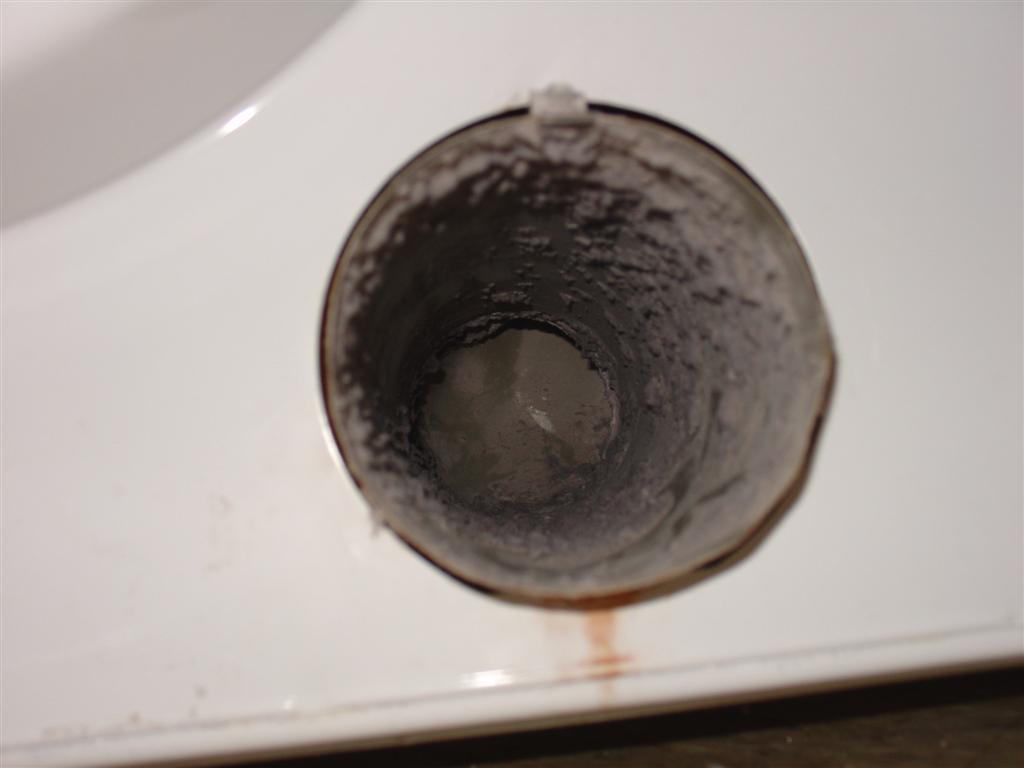
This is after cleaning the lint out of the dryer exhaust
vent. Quite a difference!
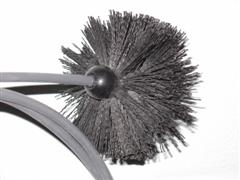
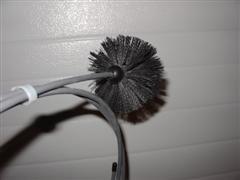
I just treated myself to this dryer vent brush. It is a 4" round brush securely
attached to a wire that has the feel of an electrician's snake. This is helpful
when threading the dryer vent brush into the main dryer vent as we shall see
later.
Run the dryer vent brush into the exhaust vent at the back of the dryer, and
then pull it out. I was surprised how well it worked. Look at the before and
after pictures and judge for yourself.
Next comes the most important part of the job, cleaning out the vent pipe. I
actually pushed the wire end up the dryer vent. The only problem I had was
getting the brush itself around the bend at the bottom of the vent. This is not
the ideal vent configuration, but it�s the best I can do because the laundry
room is finished and I don't have room to move the dryer, and there is a sewer
pipe right in the way of the ideal place to run the dryer vent, and I am
certainly not going to relocate a sewer line.
I went outside and pulled the brush up through the vent pipe. Wow, look at all
that lint that came out! I used to use rags attached to a wire but this dryer
vent brush is specifically designed for this task, and as usual when using
specialty tools, makes the job a lot easier.
The job is complete. All that remains is to reassemble the outside dryer vent,
push the dryer back to the wall and reconnect it to the vent, and vacuum up any
stray lint in the basement.
I am happy to provide this information for free, so please do not feel obligated, but it does cost me money to maintain this website. If I've helped save you time, money, and aggravation and you'd like to say thanks with a small donation, I really do appreciate it.
| Home |