I created this page because, much to my surprise, I could not find any information
on the Internet for DIY (Do It Yourself) Miele vacuum cleaner repair. Sure, there are
plenty of sites out there advertising repair services (more about this later) but nothing for the do it
yourselfer. Well, here you go. I hope this helps others who are as confused
about disassembling their Miele as I
was.
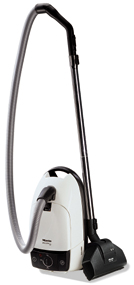
We have owned our Miele S300 canister vacuum cleaner since
1998 and I will admit that it has a hard life. My wife is a neatness nut.
She is vacuuming constantly and she is not as careful as she should be with
the machine, often bumping it and thumping it up and down stairs. That the
Miele stands up to this heavy use and abuse day in and day out is a tribute
in itself, and I would not hesitate to buy another Miele if this one were to
someday die beyond my ability to fix it.
The Miele canister vacuum cleaner is similar in many ways to a fine imported
sports car. It is expensive, it has superb German engineering, and sleek, sexy
good looks, and when it works, it works extremely well.
Unfortunately, like an imported sports car, maintenance is problematic.
Parts are expensive and repairs, in addition to being expensive, seem to require
long periods of time in the shop. This is probably why there are so many sites
listed when you Google Miele vacuum cleaner repair!
With kids in the house and the endless mess they generate, and considering that the
vacuum cleaner is my wife's favorite appliance, we cannot afford to be without
the Miele for an hour, let alone a week or two, and buying a second vacuum
cleaner kind of defeats the purpose of having the expensive Miele in the first
place.
Our Miele has been plagued over the years by a number of minor but annoying
problems. The cord winder recently broke (again) and this time I decided I would
repair it myself. I have repaired nearly every appliance in the house at one
time or another, so I figured how hard could it be to repair a vacuum cleaner?
I ordered a new cord winder online from Potomac Vacuums and
they shipped it to me promptly and free too! When the part arrived, I put the Miele up on my work bench (the
kitchen table) little realizing that I was about to be humbled by the simple act
of taking this Miele vacuum cleaner apart!
After struggling with it for a while, I swallowed my pride and picked up the
phone and called the guys at Potomac
who walked me through the process. It
turned out that the repairs were surprisingly easy, but there is a trick to the
disassembly. Watch and learn, and then you too can repair your Miele. All you
need is a Phillips head screwdriver.
Click on
any of the images for a larger view.
This should go without saying, but the first step is to
unplug the machine.
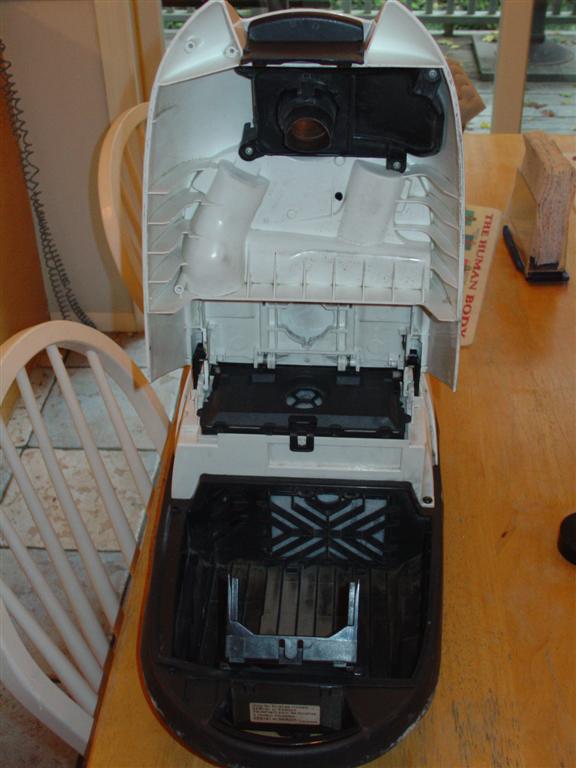
Next, open it up and remove the bag.
Now you will need to remove the lid. There are white plastic
clips on either side that you must carefully disengage by pushing them
towards the center of the machine. Click the picture above and you can see
that the right side clip has been disengaged.
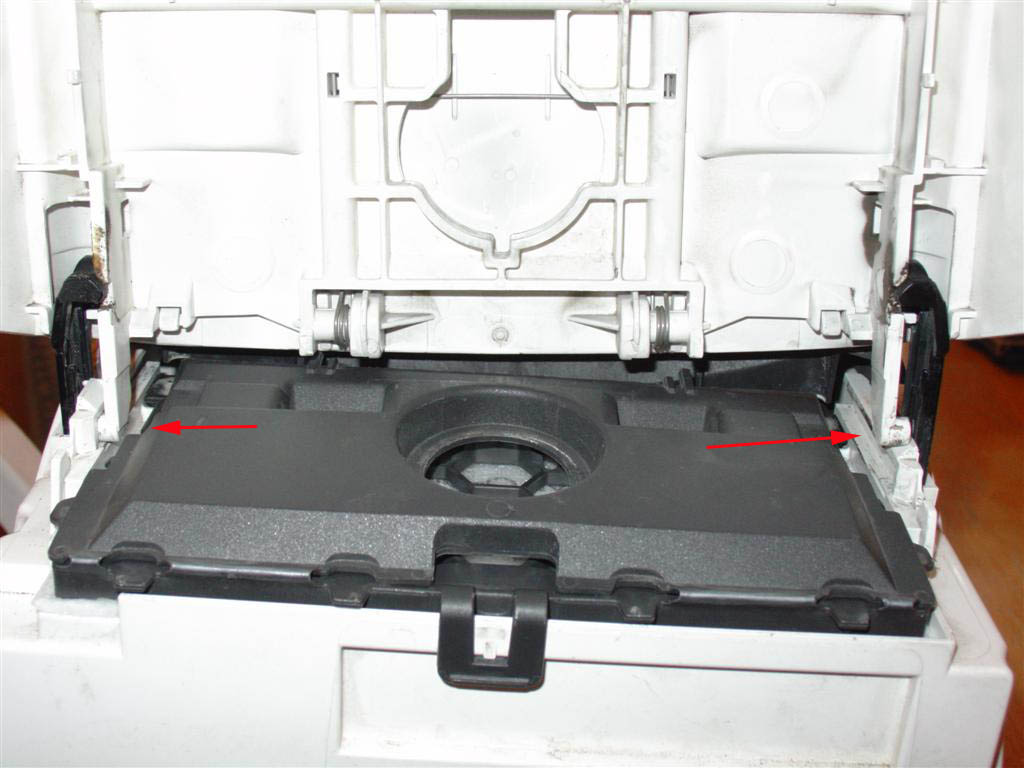
Once the clips are disengaged, the lid can be lifted clear
of the body. Note the thin black plastic tabs on the lid that insert into
slots in the body. Set the lid aside someplace safe where nobody will step on it.
As an aside, I have twice replaced the dust channel, the fragile black piece
of plastic visible at the top of the lid. Fortunately it is not a terribly
expensive part and it is very easy to replace because it is only secured by
four screws.
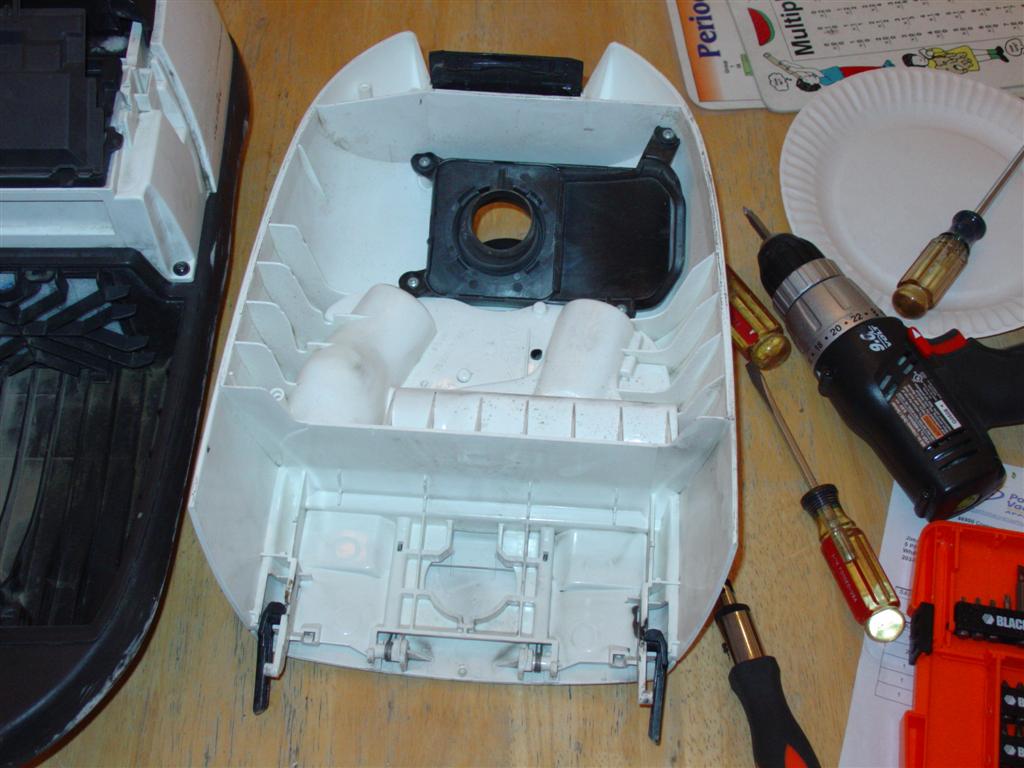
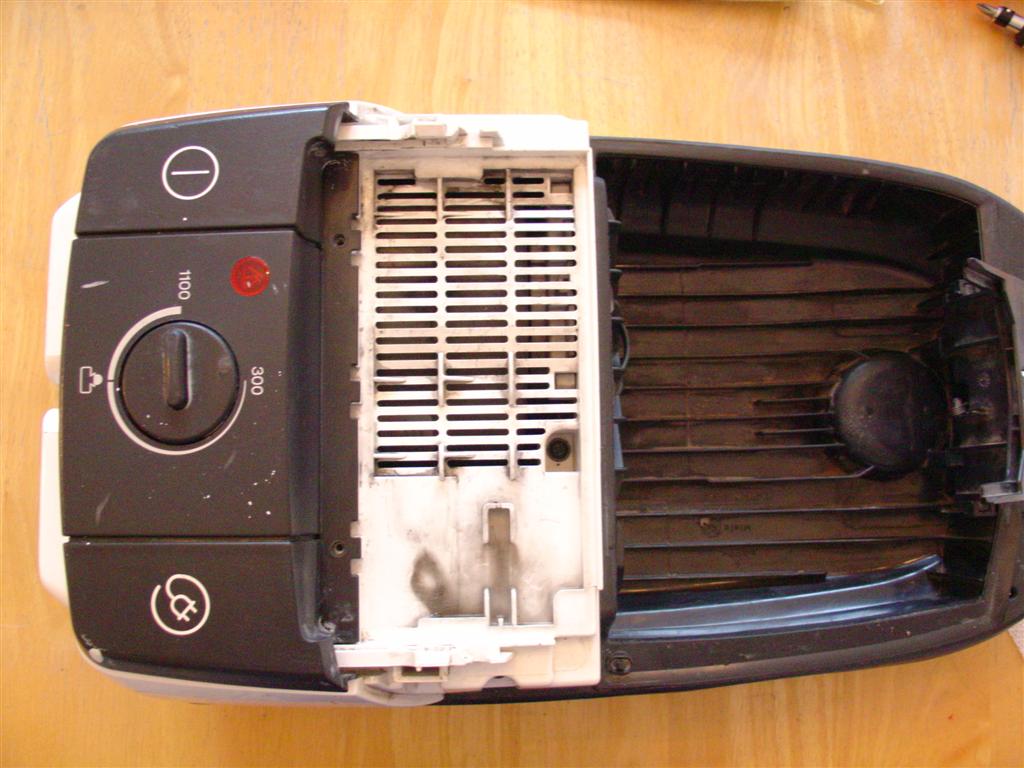
Go back to the vacuum cleaner body. The next step is to remove the air
filter. It is secured by two fairly obvious screws. These screws also hold
down the switch assembly, which we will remove in the next step. But for
now, go ahead and remove the screws and lift off the air filter. Put it
aside where you won't lose it.
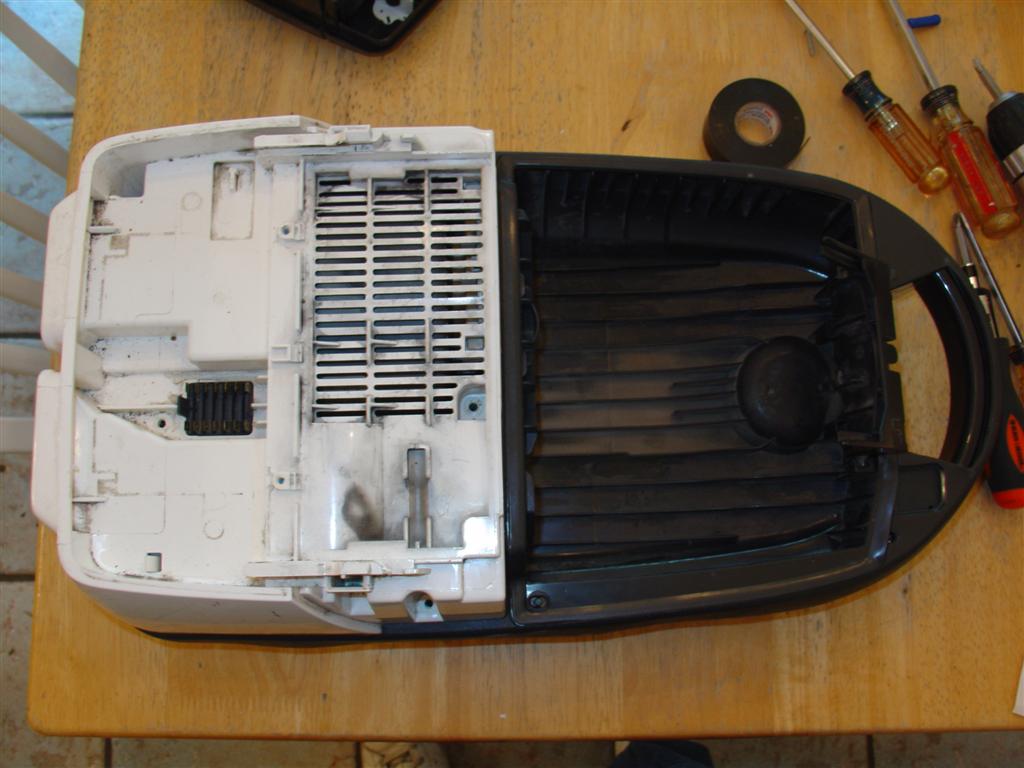
Here you can see that the air filter has been removed and we
are ready to remove the switch assembly. At this point the only thing
holding the switch assembly to the body is the electrical connector
underneath, and a plastic pin or two. Get a good grip on the switch assembly
and lift it straight up with a firm but gentle tug.
This is the underside of the switch assembly after it has
been removed from the body. The white rectangular electrical connector in
the center mates to the black rectangular electrical connector in the body,
seen on the next picture. Put the switch assembly in a safe place until we
reassemble the vacuum cleaner.
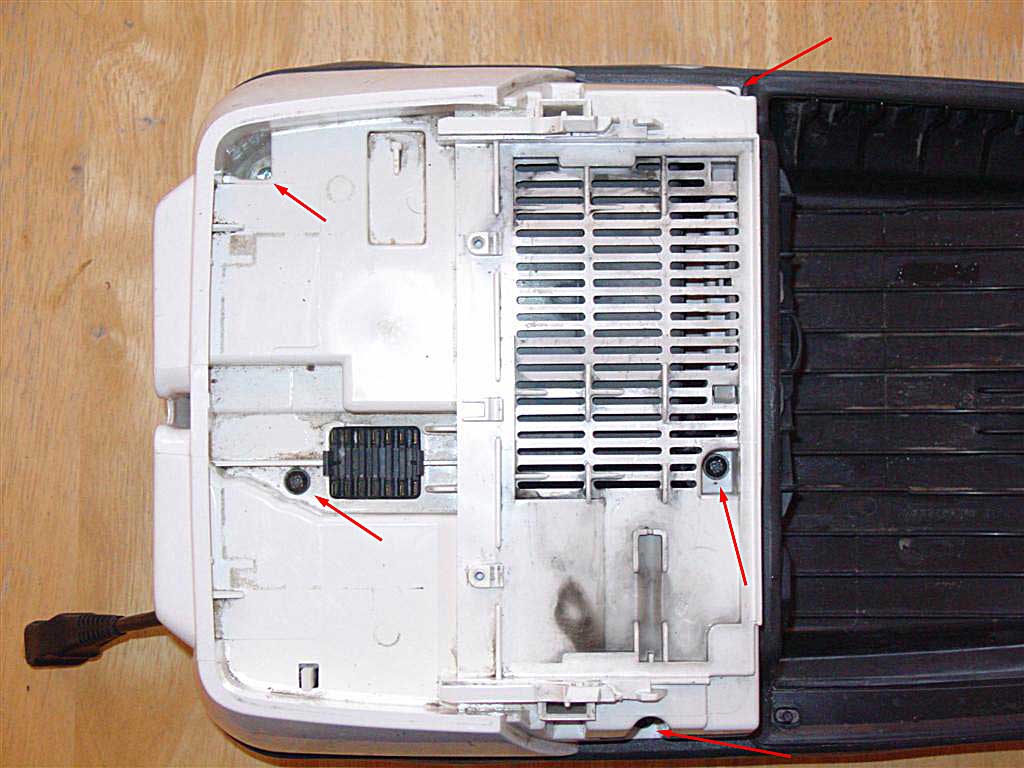
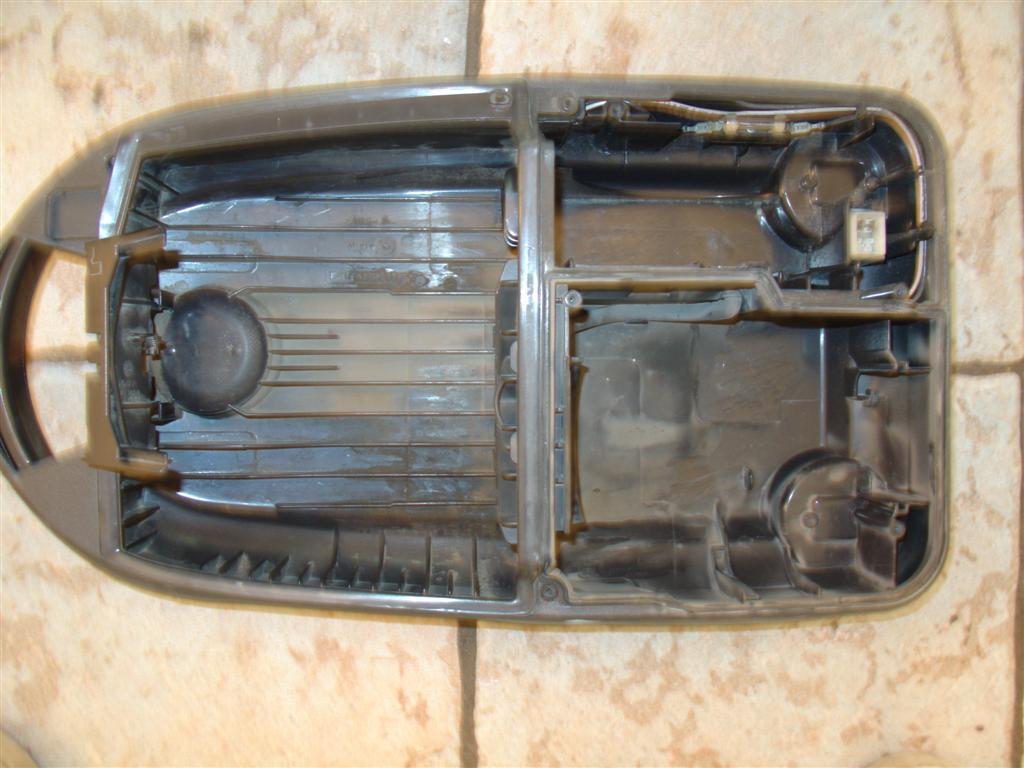
Here we see the body with the switch
assembly removed. We're almost there. The next step is to remove five
screws, one of which at upper left is hidden in a deep recess. Click the picture above to
see the location of these screws.
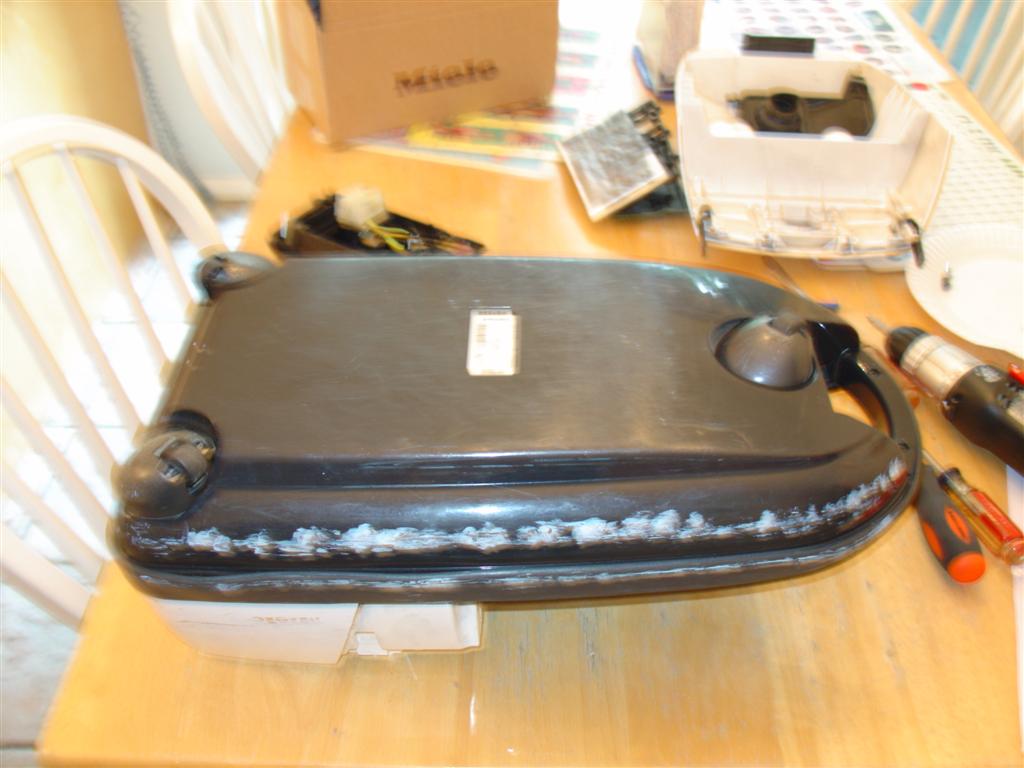
The five screws have been removed.
Carefully flip the vacuum cleaner over so that the black bottom and the
wheels are pointing up.
Here it is, belly up. Nothing is holding it together at this
point, so just lift the entire base (the big black part) off and set it
aside. It is not necessary to remove the rubber bumper that goes all the way
around the outside of the base. As I learned the hard way, It is difficult
to reattach.
The inside of the base is likely to be pretty grungy. You
could clean it up a bit with a damp cloth (I did), but there are wires in there so I
wouldn't get it too wet.
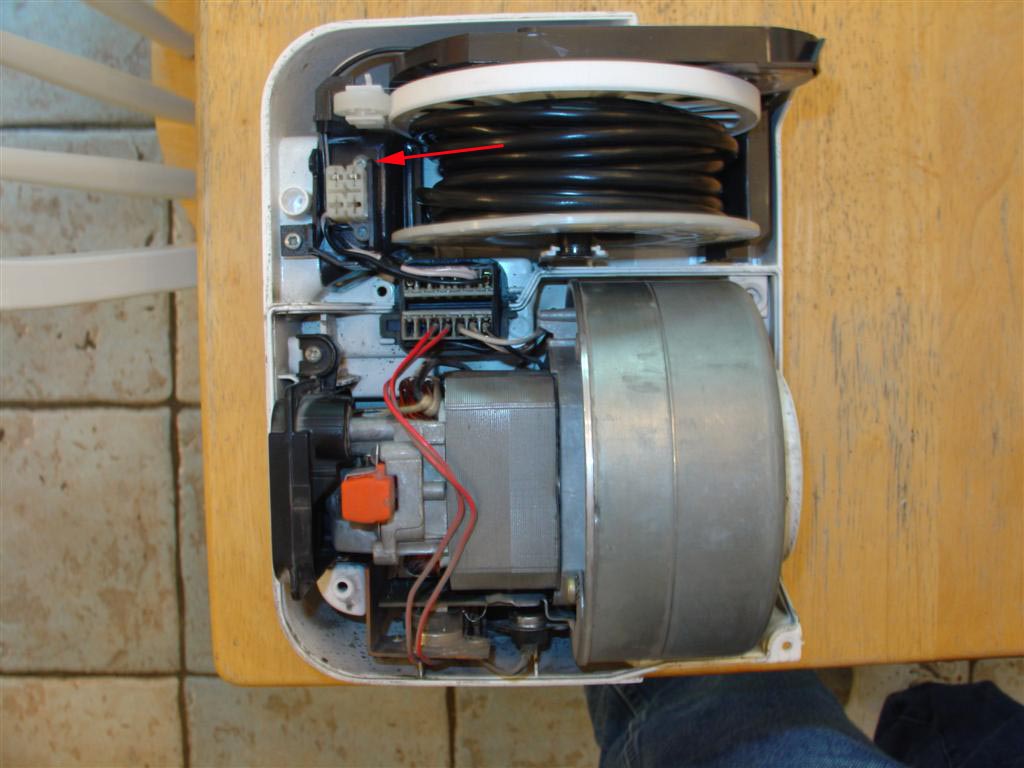
At last! The Miele's innards are exposed. The
motor is at the bottom of the picture and the cord winder is at the top.
Remove one screw securing the cord winder electrical connector and then
disconnect the electrical connector.
You may now lift out the cord winder
and replace it.
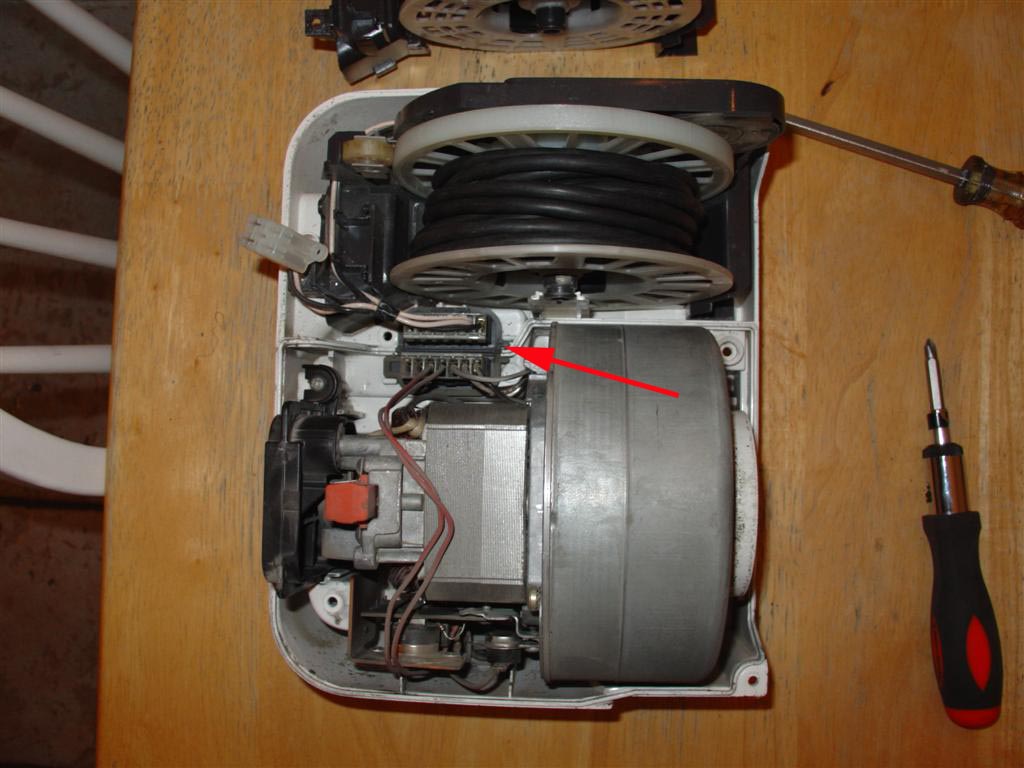
I was also having an
intermittent electrical connection problem which I thought was related to the
problematic cord. It turned out to be an unrelated problem with one of the electrical connectors in
the center of the machine, pictured above. Part of the plastic clip designed to hold
the connectors together was cracked. Unfortunately I did not have a
replacement part, so for now I
wrapped some electrical tape around the connector to hold it securely together.
This seems to have done the job. But the
next time something else breaks on this Miele, I will order this part too
and replace both at the same time.
Follow the instructions in reverse to put your vacuum cleaner
back together.
I hope you found my little tutorial useful.
I am happy to provide this information for free, so
please do not feel obligated, but it does cost me money to maintain this
website. If
I've helped save you time, money, and aggravation and you'd like to say
thanks with a small donation, I really do appreciate it.
March 2006 update: Another cord winder problem. There
was about two feet of cord
exposed, but the cord would neither extend nor retract. Time to take the Miele
apart again.
Good thing I created this web page! After a quick review I
had the Miele apart in no time. I'm getting good at this.
The problem was immediately obvious. The cord was
tangled and a loop of cord was wedged
between the winder reel and the housing. Click for a close-up.
I untangled the cord and unwound it from the reel.
My previous electrical connector repair has been working fine, so I felt no
need to fix something that was no longer broken.
Here is another view of the insides of
the Miele with the cord unwound. Click for a close-up of the electronics. If
you look closely you can see the electrical tape around the connector at
center.
I rewound the cord and reassembled the Miele. It's back in
operation now and as good as new! Once again I'm a hero. This is not rocket
science guys!
November 2006 update: Thank you
all for the many positive comments I have received
about this page. Two of the more useful comments included
additional repairs that readers have done on their
own Miele's. One described how to replace only the electrical cord (the wire
itself) without replacing the entire, very expensive, cord winder assembly.
The second was how to replace the motor. Note that I have not tried either
and hopefully I will never have to, so I have no additional pictures, but I
will include the written directions as provided to me in case others would
like to save themselves some money. Let me know if they prove useful.
October 2012 update: Before
you replace your cord winder like I did, read this! You might be able to
repair your Miele for free. The most common problem with the Miele is
intermittent or unpredictable operation. This can result in bizarre
behavior, such as where the cord rewind switch seems to operate as the power
switch. If you jiggle the cord or pull the cord it causes the power to turn
on and turn off. There is a simple explanation. What happens is the cord
winder develops side to side play, causing intermittent electrical contact
between the electrical connectors on the cord winder and those on the inside
of the body of the machine. Bending the connectors is a temporary fix. What
you need to do is force these connectors back into contact by taking up the
excess space on the cord winder reel. Some people use washers (big ones),
others make their own spacers out of scrap plastic or whatever they have
lying around the house. Someone recently suggested using hose washers. They
are usually made out of rubber, readily available at hardware stores or Home
Depot etc., and cheap.


.JPG)
.JPG)
.JPG)
.JPG)
.JPG)
.JPG)